
How to draw a cat, easy step by step
7 easy steps for ages 3-7. Watch it, trace it, draw it on your own and get a shape match score, then colour it in. Free printable and certificate.
Drawing is best with a finger or a pencil on a tablet or phone
Scan the code with the tablet's camera to open this page there. You can also use the mouse here, or print the free cat drawing sheet and use a real pencil.
1Watch it
See the cat drawn one step at a time. The new part is orange.
Press play and watch the cat being drawn, one step at a time. Then try it yourself below.
2Trace it
Follow the grey lines with your finger or a pencil. Start at the green dot for each part: 1 is the head. Then press Check.
The score is worked out on this device. Nothing you draw is saved or sent.
3Draw it on your own
No lines to follow this time. Draw the cat big, then press Check for your shape match score. It looks for each part and where it is.
Look at the cat, then draw it big in the box.
The score is worked out on this device. Nothing you draw is saved or sent.
4Make it yours
Colour your cat any way you like. Tap a shape to fill it, or use the brush to add stripes, spots and a background. No score here.
Tap inside a shape to fill it. No score here: every cat is right. Add stripes, spots, a hat, a background, anything you like. Your picture stays on this device.
5Print it
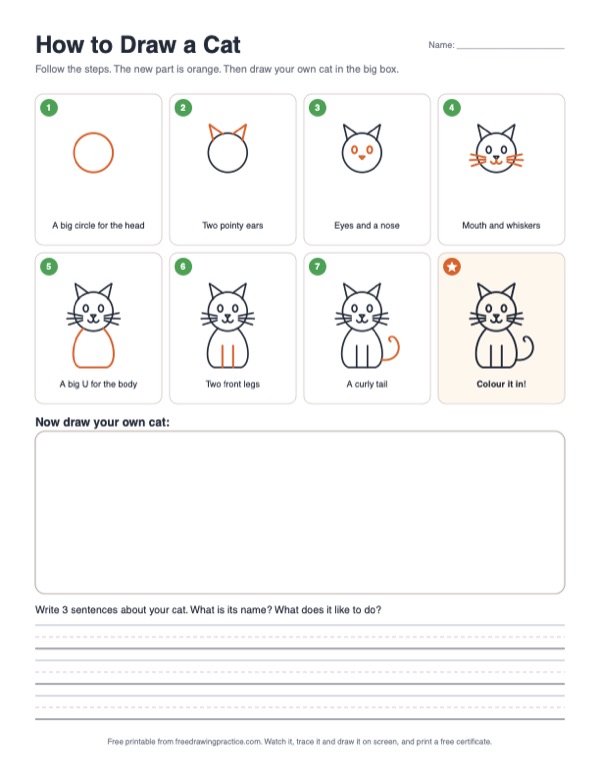
A free drawing sheet with all 7 steps, a big box to draw your own cat and lines to write about it. And a certificate with your child's name.
Free printable PDF
Free certificate
Type your child's name and print a certificate for the fridge. Made on this device: the name is not sent anywhere.
How to draw a cat: the steps
Step 1. Draw a big circle for the head. Start at the top and go all the way round.
Step 2. Add two pointy ears on top of the head. They look like little triangles.
Step 3. Draw two oval eyes. Then a small upside-down triangle for the nose, in the middle.
Step 4. Under the nose, draw a mouth that looks like the letter w. Then three whiskers on each side.
Step 5. Under the head, draw a big U shape for the body. Make it wide at the bottom so your cat can sit.
Step 6. Draw two lines down the middle of the body for the front legs.
Step 7. Last, add a long curly tail coming out of the side. Your cat is done!
Tips for parents and teachers
- Say each step out loud while you draw it, then let your child copy it. That is how directed drawing works in class.
- A finger works fine on a phone or tablet. A pencil or stylus is better: the line gets thicker when you press harder.
- The score only checks how close the shape is to the model cat. Wobbly lines are fine. Always finish with step 4, where there is no score and every cat is right.
- In class: draw the cat together, then ask children to write three sentences about it on the printable. Good for morning work and early finishers.
Questions
What is the easiest way to draw a cat?
Start with shapes you already know: a circle for the head, two triangles for the ears, and a big U for the body. Then add the face, the legs and a curly tail. That is all 7 steps on this page.
What age is this for?
Ages 3-7. Younger children can trace it with a finger; older children can draw it on their own and try to beat their shape match score.
How does the shape match score work?
When your child presses Check, the page compares the lines with the model cat: are the head, ears, body, legs and tail there, and in about the right place? It runs on your device. The drawing is never uploaded or saved.
Do I need a stylus?
No. A finger is enough. A pencil or stylus (like an Apple Pencil) is nicer because the line follows how hard you press. On a computer you can use the mouse, or print the PDF and draw with a pencil.
Is it really free?
Yes. The lesson, the printable PDF and the certificate are free, with no sign-up and no ads.
More to draw
Practising letters too? Try the free tracing on FreeHandwritingPractice.